
Can you paint on a wall with watercolor and have it last?
Yes, actually!
I decided to give it a try on a blank wall. In order for the watercolor paint to stay visible it needed to have a surface to adhere to. I first covered the entire wall with premixed joint compound from the hardware store, which is basically plaster. (Tip, if you get it in the contractors section it is about half the price they sell it for in the regular paint section) I applied it with a medium sized putty knife in a random splotches in all directions until the whole wall was covered. My intent was not only to give the wall a surface for the paint to bite but also to add a subtle, modern texture. I made sure not to leave any really thick areas, just enough to add light texture that paint could settle into. The idea was to make something sort of like a fresco but watercolor on dry plaster.
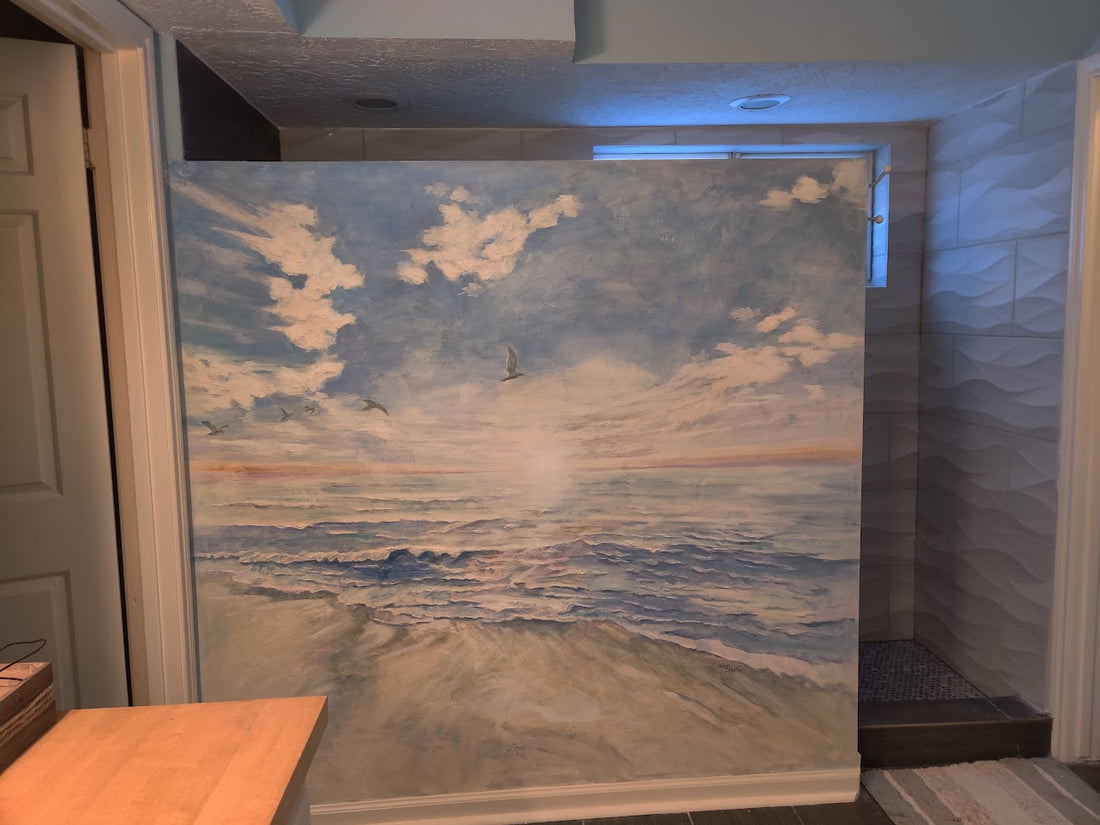
I had decided on a beach scene as this was in a bathroom. I made a quick, very light pencil sketch on my wall once the texture was completely dry. I decided it might be cool to built up some extra texture within a few areas of the design for added emphasis. I used the same joint compound, but this time I applied it with a small palette knife to control the shape. I could have done some fine detail and sanded it smooth, and may experiment with that in the future for a more sculptural design. Here though, I chose not to sand and to leave a rougher texture. I built up some waves, birds and clouds.

Once all the compound was dry I started to paint with professional grade watercolors.

I laid in all the colors for my design, and as always watercolor dries lighter and usually requires quite a bit of layering to achieve stronger color.

While I did rather enjoy something about the blotchy look of the initial layers, the piece didn't quite have the feel I was envisioning. It seemed to chaotic. I wanted a bit smoother, more relaxing feel to it.

I added more layers, more color and more water as I went. In these subsequent layers, I did take a bit more care to blend edges for that smoother look. I painted in pretty much the same manner as I would have on paper, although for me it was freer and sloppier!

I did love the end result! To protect the piece, I decided to go in a little unconventional direction. I finished the wall with a thick coat of clear furniture wax. I brushed it on the whole wall. It is non-yellowing, quite protective and didn't disturb the paint at all. The wax dries/sets up pretty quickly. I used a soft cotton cloth to buff areas I wanted to highlight. It has held up wonderfully for 3 years so far with no sign of wear, fading, or yellowing. I am considering it a win for thinking outside the box!
For supplies and other art product recommendations see my storefront
If you are looking for new ways to generate ideas I recommend my latest book, How To See What Isn't There

As an Amazon Associate I earn from qualifying purchases.